
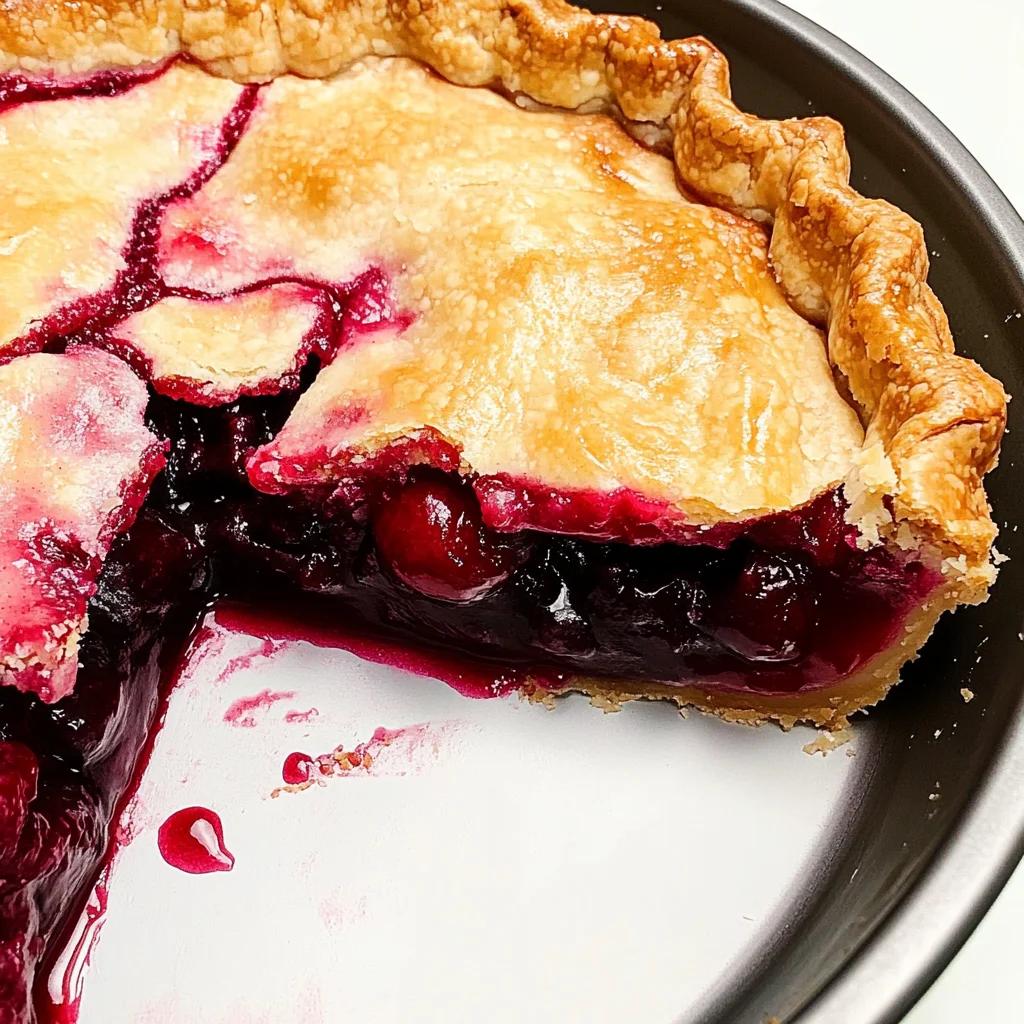
Easy Homemade Cherry Pie is a delightful dessert that brings the sweet taste of summer to your table all year round. This classic recipe is perfect for any occasion, whether it’s a cozy family dinner or a festive gathering with friends. With its buttery, flaky crust and luscious cherry filling, this pie stands out for its simplicity and flavor. You can easily prepare it with fresh or frozen cherries, making it a versatile choice for any season.
Why You’ll Love This Recipe
- Quick Preparation – This easy homemade cherry pie can be whipped up in just 20 minutes of prep time, making it a go-to dessert for busy days.
- Delicious Flavor – The combination of tart cherries and sweet pie crust creates an irresistible flavor that will impress your guests.
- Versatile Ingredients – Use fresh or frozen cherries based on what’s available to you, ensuring you can enjoy this pie anytime.
- Perfect for Any Occasion – Whether it’s a holiday feast or a casual summer picnic, this pie fits right in and satisfies every sweet tooth.
- Family-Friendly – Enjoy making this recipe together with loved ones; it’s fun and simple enough for everyone to join in!
Tools and Preparation
Before diving into the recipe, gather your tools to make the process seamless. Having everything ready ensures a smooth baking experience.
Essential Tools and Equipment
- 9-inch pie dish
- Mixing bowl
- Knife
- Baking tray
- Aluminum foil
Importance of Each Tool
- 9-inch pie dish – A standard size that allows for even cooking of your cherry pie while providing ample space for filling.
- Mixing bowl – Essential for combining ingredients without mess; keep everything organized during preparation.
- Knife – Used to create slits in the top crust for venting steam; also helpful if you choose to make a lattice top.
Ingredients
Classic, quick and easy cherry pie recipe, homemade with simple ingredients. A buttery flaky pie crust is filled with fresh or frozen cherry filling.
For the Pie Filling
- 1 batch Homemade cherry pie filling
For the Crust
- 1 package Refrigerated pie crust
How to Make Easy Homemade Cherry Pie
Step 1: Prepare the Cherry Pie Filling
- Begin by preparing your homemade cherry pie filling according to your favorite recipe.
- Allow the filling to cool down completely before assembling the pie.
Step 2: Prepare the Pie Crust
- Unfold one pie crust and spread it evenly in a 9-inch pie dish.
- Trim and crimp the edges as desired, then set aside.
Step 3: Assemble the Pie
- Once the filling has cooled, pour it into the prepared bottom crust evenly.
- Unfold the second pie crust and place it over the filling.
- Trim and crimp the edges again to seal in all those delightful flavors.
Step 4: Venting Techniques
- Use a knife to cut slits in the top crust for steam venting.
- Alternatively, consider creating a lattice top using strips of pie crusts for added flair.
Step 5: Baking Preparation
- Cover the edges of the pie crust with aluminum foil to prevent burning during baking.
- Place the dish on a baking tray for easy handling later on.
Step 6: Bake at High Heat
- Preheat your oven to 425 degrees F (220 degrees C).
- Bake on the middle rack for 15 minutes until slightly golden.
Step 7: Lower Temperature Baking
- Reduce heat to 375 degrees F (190 degrees C).
- Continue baking for another 30 minutes until the entire pie is golden brown.
Step 8: Enjoy Your Pie!
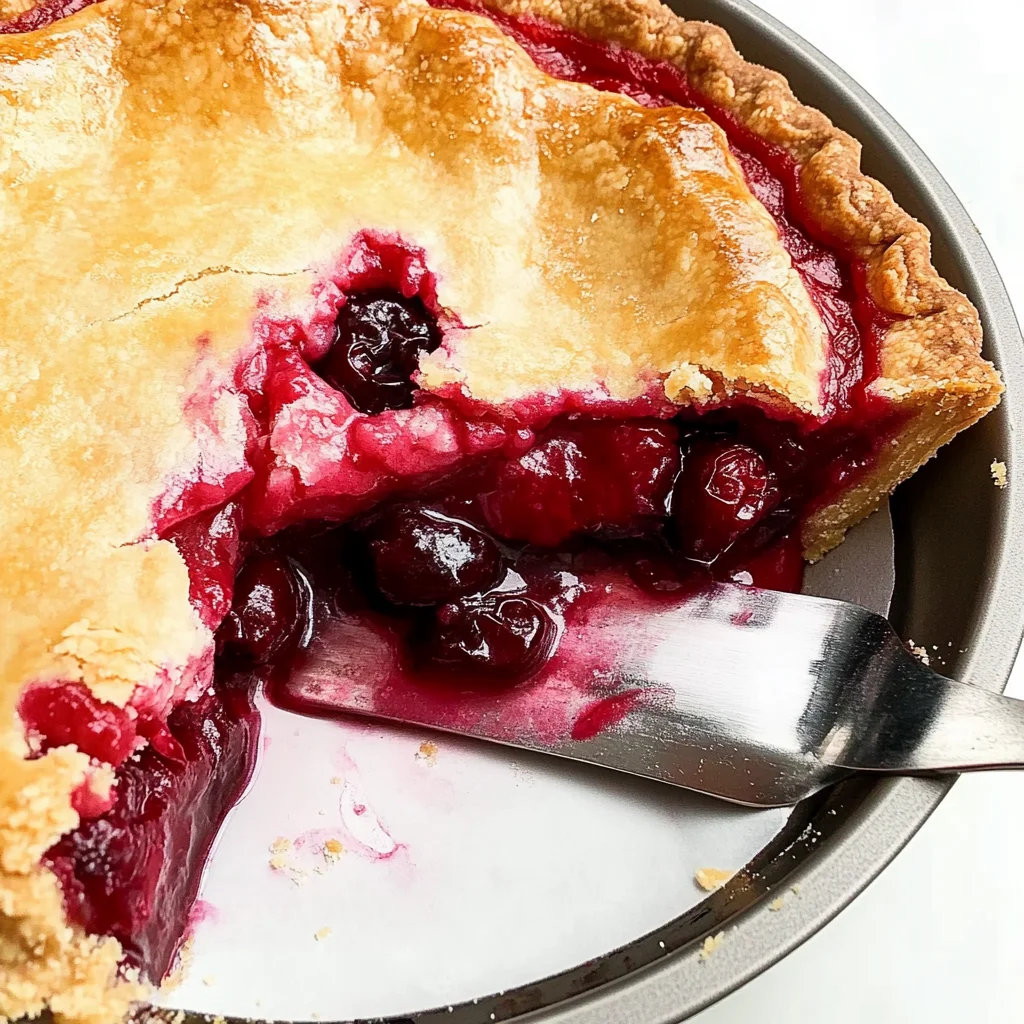
- Once done baking, remove from oven and let cool slightly.
- Slice into six pieces and serve warm or at room temperature. Enjoy your Easy Homemade Cherry Pie!
How to Serve Easy Homemade Cherry Pie
Serving Easy Homemade Cherry Pie can elevate your dessert experience. The sweet and tangy flavor of the cherries pairs wonderfully with various accompaniments. Here are some delightful serving suggestions.
A La Mode
- Vanilla Ice Cream – A classic pairing, the creamy ice cream contrasts beautifully with the warm pie.
- Whipped Cream – Light and fluffy, whipped cream adds a lovely texture and sweetness to each slice.
Fresh Fruit Medley
- Berries – Serve fresh strawberries, blueberries, or raspberries alongside for a refreshing burst of flavor.
- Sliced Bananas – Their sweetness complements the tartness of the cherry filling perfectly.
Sauces and Syrups
- Chocolate Sauce – Drizzle chocolate sauce over the pie for an indulgent twist.
- Caramel Sauce – A rich caramel drizzle enhances the cherry flavors and adds a decadent touch.
How to Perfect Easy Homemade Cherry Pie
To create the perfect Easy Homemade Cherry Pie, consider these essential tips that can enhance your results.
- Use Fresh Cherries – Fresh cherries provide superior flavor compared to canned or frozen options.
- Chill Your Dough – Keeping your pie crust cold helps achieve that flaky texture everyone loves.
- Adjust Sweetness – Taste your cherry filling and adjust the sugar according to your preference.
- Vent Properly – Make sure to cut slits in your top crust for steam to escape, preventing sogginess.
- Let it Cool – Allowing the pie to cool before slicing helps maintain its shape.
Best Side Dishes for Easy Homemade Cherry Pie
Pairing side dishes with your Easy Homemade Cherry Pie can create a well-rounded meal. Here are some delicious options that complement this dessert wonderfully.
- Vanilla Ice Cream – A scoop of vanilla ice cream is a timeless choice that balances the pie’s tartness.
- Cheese Plate – Soft cheeses like brie or goat cheese can provide a savory contrast to the sweet pie.
- Fruit Salad – A light fruit salad adds freshness and brightness to your dessert table.
- Crusty Bread – A slice of freshly baked bread can serve as a nice palate cleanser between bites.
- Coffee or Tea – Brewed beverages like coffee or tea offer warmth and enhance the overall dessert experience.
- Yogurt Parfait – Layer yogurt with granola and berries for a delightful side that feels indulgent yet healthy.
Common Mistakes to Avoid
Making an Easy Homemade Cherry Pie can be a delightful experience, but certain mistakes can hinder your results. Here are some common pitfalls and how to avoid them.
- Not letting the filling cool – If you pour hot cherry filling into the pie crust, it can make the crust soggy. Allow the filling to cool completely before adding it to the crust.
- Ignoring crust thickness – A pie crust that is too thin can break easily while baking. Ensure your crust is evenly rolled out and thick enough to hold the filling without cracking.
- Overbaking or underbaking – Baking for too long can burn your pie, while insufficient baking may leave it raw. Keep a close eye on the color of the crust; golden brown indicates it’s ready.
- Skipping venting slits – Not cutting slits in the top crust can cause overflow and mess in your oven. Always create vents for steam to escape, or consider a lattice design.
- Using fresh cherries without pitting – Biting into an unpitted cherry is unpleasant. Make sure to pit all cherries if using fresh ones; this step is essential for enjoying the pie.
Refrigerator Storage
- Store your Easy Homemade Cherry Pie in an airtight container.
- It will last up to 3-4 days in the refrigerator.
- To maintain freshness, cover it with plastic wrap if not using a container.
Freezing Easy Homemade Cherry Pie
- You can freeze your pie for up to 2 months.
- Wrap it tightly in plastic wrap and then aluminum foil to avoid freezer burn.
- Label with the date so you remember when you made it.
Reheating Easy Homemade Cherry Pie
- Oven: Preheat your oven to 350°F (175°C) and bake for about 15-20 minutes until warmed through.
- Microwave: Heat individual slices on medium power for 30-60 seconds. Check frequently to avoid overheating.
- Stovetop: Place slices in a skillet over low heat, covering with a lid. Warm for about 5-10 minutes, checking regularly.
Frequently Asked Questions
How do I make my Easy Homemade Cherry Pie filling?
To make the filling, combine fresh or frozen cherries with sugar, cornstarch, lemon juice, and a pinch of salt. Cook until thickened and let it cool before adding it to the pie crust.
Can I use frozen cherries for this recipe?
Yes! Frozen cherries work great in this recipe. Just ensure they are thawed and drained of excess liquid before making your filling.
How do I know when my Easy Homemade Cherry Pie is done?
Your pie is done when the crust turns golden brown and the filling bubbles slightly through the slits in the top crust.
Can I customize my Easy Homemade Cherry Pie?
Absolutely! You can add spices like cinnamon or almond extract for added flavor. Consider mixing other berries with cherries for a berry medley pie!
Final Thoughts
This Easy Homemade Cherry Pie is not only delicious but also versatile enough for any occasion. Whether you’re celebrating summer or simply satisfying your sweet tooth, this recipe has something for everyone. Feel free to customize it with different fruits or flavors! Give it a try—you won’t be disappointed!
Easy Homemade Cherry Pie

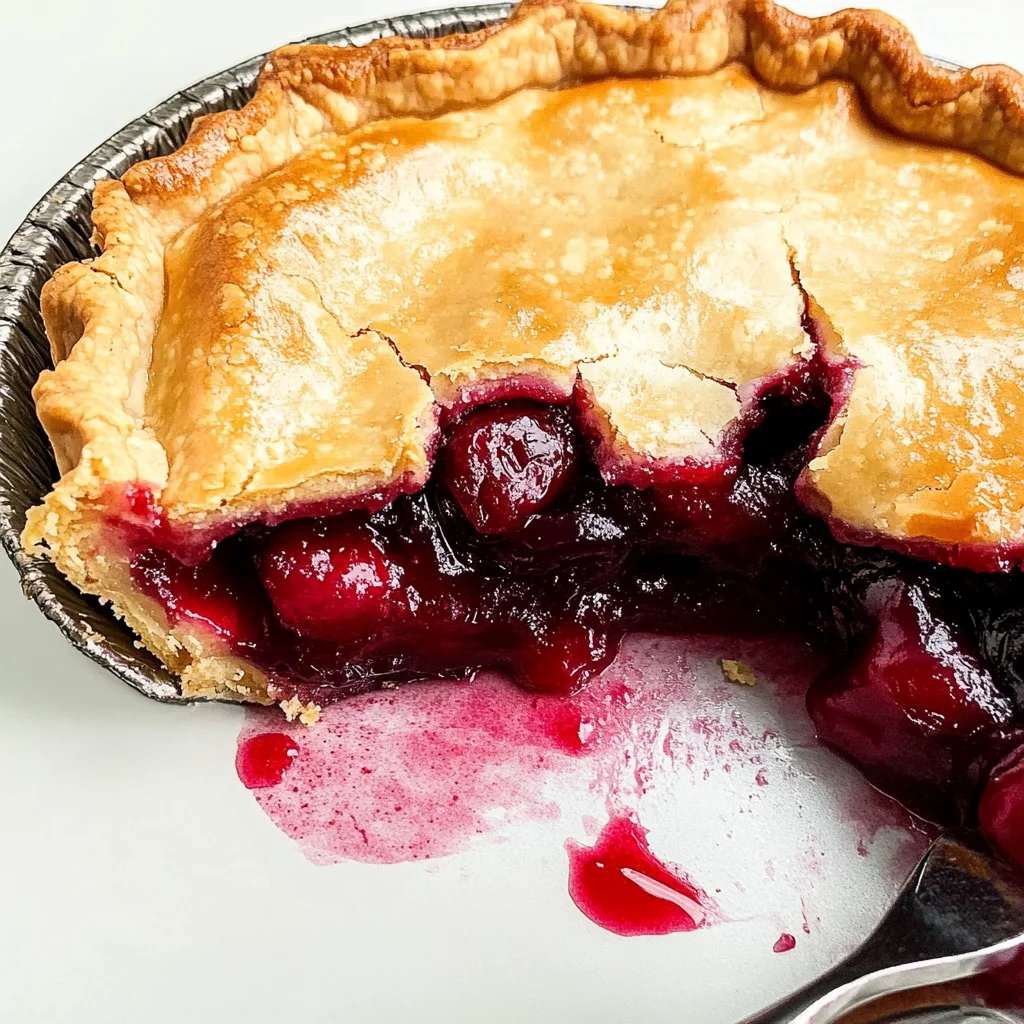
Indulge in the sweet and tangy flavors of Easy Homemade Cherry Pie, a classic dessert that captures the essence of summer in every bite. With a buttery, flaky crust enveloping a luscious cherry filling, this pie is perfect for any occasion—from cozy family dinners to festive gatherings. You can easily whip it up in just 20 minutes using fresh or frozen cherries, making it a versatile treat for any season. Whether served warm with a scoop of vanilla ice cream or enjoyed on its own, this pie promises to delight friends and family alike.
- Prep Time: 20 minutes
- Cook Time: 45 minutes
- Total Time: 1 hour 5 minutes
- Yield: Serves approximately 8 slices 1x
- Category: Dessert
- Method: Baking
- Cuisine: American
Ingredients
- 1 batch Homemade cherry pie filling
- 1 package Refrigerated pie crust
Instructions
- Prepare cherry pie filling according to your favorite recipe and let it cool completely.
- Unroll one pie crust into a 9-inch pie dish, trimming and crimping the edges as desired.
- Pour the cooled cherry filling evenly into the crust.
- Cover with the second pie crust, sealing the edges by crimping again.
- Cut vent slits for steam to escape or create a lattice top if desired.
- Cover edges with aluminum foil and place on a baking tray.
- Preheat oven to 425°F (220°C) and bake for 15 minutes until slightly golden.
- Reduce temperature to 375°F (190°C) and bake for an additional 30 minutes until golden brown.
Nutrition
- Serving Size: 1 slice (approximately 100g)
- Calories: 290
- Sugar: 22g
- Sodium: 200mg
- Fat: 14g
- Saturated Fat: 6g
- Unsaturated Fat: 8g
- Trans Fat: 0g
- Carbohydrates: 38g
- Fiber: 2g
- Protein: 3g
- Cholesterol: 15mg

Leave a Comment